Specify the complete wall, including its edges
Wall Rendering Crewe | New Surfaces on Individual Elevations
Rendering one elevation can resolve an unfinished extension, renew a failing covering or bring an altered wall into a coherent design. Its scope is more than the area between the corners. Include the top and bottom edges, openings, returns and fittings from the start. Those details determine where the new material stops and how it works with the parts of the building that are staying as they are.

On this page
Describe the wall behind the finish
Identify whether the face is bare masonry, existing render, a painted covering or a mixture created by alterations. A garage conversion or infilled opening can introduce several backgrounds within what now appears to be one flat elevation. The selected system must suit those materials and their condition. Where the construction is uncertain, the assessment should resolve what matters before application. A photograph is a useful introduction to the job, but it cannot establish adhesion or the depth of an old repair.
The article on a former garage wall considers a common type of changed background without assuming every conversion is built the same way. New lintels, infills and original masonry need a coordinated specification. Reinforcement may form part of the chosen system, but it should not be treated as a universal way to conceal unresolved construction or movement. The technical detail needs to follow the wall rather than assume a continuous finish makes all differences beneath it irrelevant.
- Set the edges Decide where new render stops against brick, stone or an existing finish.
- Prepare the background Remove loose material, repair masonry and prepare suction and surface key. Existing paint needs a specified removal or alternative treatment.
- Base coat Built up to level the wall, with mesh where backgrounds change or crack.
- Finish Matched to the rest of the house or chosen as a deliberate contrast.
- Shed the water Copings, sills and the base bead keep rain off the top and away from the bottom edge.
The usual order of work. The survey and the chosen products decide the actual steps.
Give the new surface a defined perimeter
Choose where the work ends at corners and changes of material, including any return onto an adjoining face. A narrow strip left behind a pipe still needs a suitable treatment. At roof edges and abutments, the render must meet the associated weathering detail appropriately. At the base, ground levels and the construction's damp-proofing arrangement affect the termination. Those decisions should appear in the proposal, not be deferred until the main face has already been applied.
| Include | Describe |
|---|---|
| Background | Existing materials, coatings and known alterations |
| Perimeter | Top, bottom, corners and returns |
| Openings | Sills, heads, reveals and any replacement work |
| Fittings | What remains, moves or needs specialist attention |
| Finish | Complete system, texture and colour reference |
| Completion | Inspection, reinstatement and relevant records |
Treat the opening details as part of the elevation
A new window or door may leave disturbed material beyond the frame. The scope should include the necessary making good and establish a realistic visual result. Sills need an appropriate relationship with the finished face, and the edge beside the frame should follow the design. If another trade is replacing the opening, agree when its work will be ready and which parts the renderer completes. That avoids two contractors each leaving the same small junction for the other to resolve.
Where the building has older fabric, retained surrounds or a traditional background, lime rendering may be relevant. The assessment should identify that need rather than generalise from the appearance of nearby houses. Different sections of the same property can justify different materials. The visual relationship can be settled through samples and clear boundaries, while the technical specification remains appropriate to each construction. A single wall does not need to copy an unsuitable earlier treatment merely to look consistent.
Choose texture with a full-size view in mind
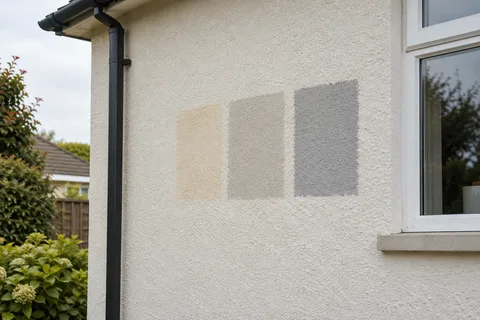
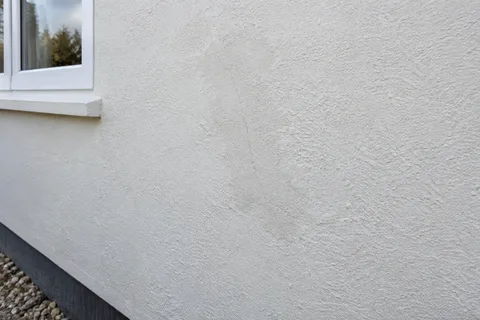
A broad wall displays its surface more clearly than a narrow panel interrupted by windows. Compare monocouche and silicone through suitable samples once the background requirements are understood. Look at grain, colour and how the surface appears in ordinary daylight. A smooth-looking finish may show irregular preparation more readily; a textured product still needs a suitable underlying face. The sample should establish the intended standard without promising that the material will hide every defect or level an unstable wall.
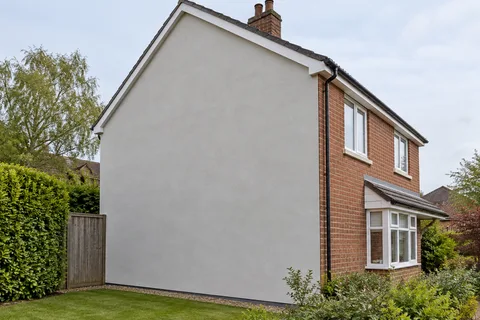
If an adjoining elevation remains untouched, decide how closely the new work should relate to it. Exact matching can be difficult because of age, weathering and texture. A deliberate break at a corner may provide a clearer result than a patch that stops in the middle of a visible plane. If the retained material is sound, there may be options for coordinating colour later, but that is a separate scope. Keep replacement and decoration decisions distinct so the owner understands what each part of the proposal delivers.
Make removal proportionate to the condition
The covering may need local repairs, partial removal or complete replacement. The reason should be explained, with a process for additional findings. A removal trial can help identify background condition and removal risks, while the repair guide covers limited defects. Neither a small crack nor an unattractive colour automatically justifies stripping every layer. Equally, a new finish should not be applied over material that cannot support it. The extent follows the assessment and the selected system's requirements.
Allow access for preparation and completion
A wall above a lower roof, beside a boundary or over a busy entrance may require a carefully arranged work area. Competent access planning should account for all stages, including inspection and return visits. The programme also needs appropriate protection and conditions for the specified materials. If associated roof or service work remains incomplete, the renderer needs a clear handover point rather than pressure to finish around an unresolved detail merely because the scaffold is available.
At completion, check the agreed perimeter and fittings as well as the main texture. Retain the system and colour information for later maintenance. A broader house-rendering project can coordinate other elevations when required, while the Crewe homepage provides the service navigation. A well-defined wall project gives one elevation the work it needs and a deliberate relationship with the rest of the building, without leaving its most awkward edges outside the brief.
Common questions
Can render cover a former garage-door opening?
It may be possible with a suitable specification, but the infill, supporting details and junction with the original wall need assessment. The finish should follow the completed construction and any movement requirements rather than be used to conceal an unresolved opening detail.
Is it enough to specify the colour and wall area?
No. Preparation, materials, edges, openings and associated work all influence the scope. A complete proposal identifies those items so different quotations can be compared and the installer knows what result is expected at the boundaries as well as across the face.
See housing and planning information for Crewe and nearby places, including the source and geography behind each figure.