Turn an exterior idea into a defined job
House Rendering Crewe | Refurbish the Exterior with a Clear Plan
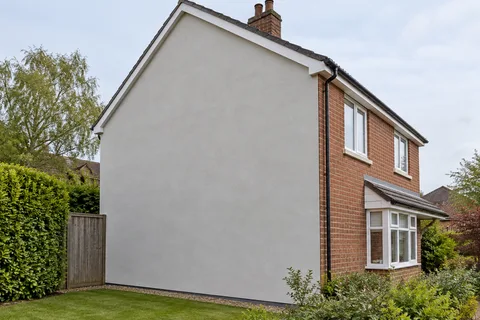
House rendering often begins with a simple wish: make the outside look more consistent and easier to look after. The work behind that result can range from repairing a few areas to replacing coverings across the entire building. The brief should connect the desired appearance with the condition of each elevation. That gives the contractor a defined project and gives you a useful basis for comparing the work being offered.

On this page
Start with the changes you can point to
List the visible issues and the alterations you want to make. A cracked rear wall, an unfinished extension and a faded front do not necessarily need the same treatment. Mark them on photographs of the whole house, including sides that are difficult to see from the road. Indicate any areas that should remain brick or retain another finish. This is a simple way to prevent a quotation for the most visible elevation being mistaken for a complete exterior package.
Include other work planned for the property. Replacement windows, a garage conversion or new rainwater pipes can affect the rendering sequence and the finished details. If those decisions are still open, say so. A proposal can distinguish confirmed work from items that depend on another design choice. That is more useful than assuming every opening and fitting will remain where it is, then cutting through new work when the wider refurbishment catches up.
- Scaffold and protection Windows, doors, paths and planting are covered; downpipes, lights and satellite brackets come off.
- Old finish tested or removed Failed render is removed; the survey decides whether any sound areas can remain within the specified system.
- Masonry repairs and beads Cracked bricks and open joints are repaired; corner, stop and base beads are fixed.
- Base coats Sand-and-cement scratch and float coats, or a manufacturer basecoat with mesh.
- Finish coat A painted, scraped or thin-coat coloured finish, applied in suitable weather.
- Fittings and junctions Fittings are refixed through the new surface; sills, roofline and abutments are sealed.
The usual order of work. The survey and the chosen products decide the actual steps.
Check what can stay on the wall
The existing covering should be assessed for adhesion, condition and compatibility with the proposed treatment. Paint that looks tired may sit over sound render; a clean-looking face may conceal detached material. Those are different scopes. Retaining suitable material can be sensible, while applying a new system over weak layers leaves the finished surface dependent on them. The quotation should explain the proposed retention or removal decision and the preparation required before application.
Local defects should also be separated from widespread failure. The repair guide explains how cracks and damaged patches need assessment before their treatment is chosen. If the main objective is a different colour on a serviceable surface, render respray may be the relevant route. A complete replacement can still be a chosen refurbishment, but its purpose should be clear. More work is not automatically a better response to every problem, and a decorative treatment is not a substitute for repairs the wall genuinely needs.
| Scope | What it changes | What must be established |
|---|---|---|
| Repair and decorate | Selected defects and the surface colour | The retained render and coating are suitable |
| Replace one or more elevations | The covering across defined wall areas | Removal, background repair and new system details |
| Add external insulation with render | The wall build-up as well as the appearance | A complete design for thickness, openings and interfaces |
Select the system before settling the sample
Silicone finishes and monocouche can both form part of a modern exterior scheme, but they involve different build-ups and textures. The background determines which specifications are suitable. Mixed masonry around an extension or altered opening may need particular preparation and junction details. The proposal should identify the materials and method, not simply name a final colour. Where a sand-and-cement finish is selected, its decoration and care should also be part of the discussion.
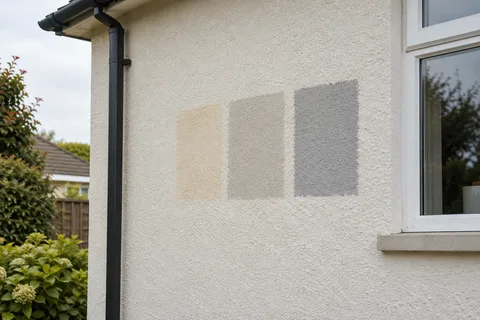
Then view a representative sample beside the roof, window frames and retained brickwork. Judge texture as well as shade, because a thin fine-grained finish and a scraped mineral surface will catch light differently. The sample should relate to the actual specification. If preparation is needed to improve an uneven wall, make that work explicit rather than expect the finishing layer to flatten the face. A preferred appearance is a design requirement to discuss, not proof that any background can receive it unchanged.
Connect the finish to the openings and roofline
A render face needs suitable edges around windows, doors, sills and the top and bottom of the wall. Existing projections may need attention if the build-up changes. The design should preserve ventilation and drainage functions, with specialist fittings handled by the appropriate people. A pipe or cable running across the elevation should have an agreed treatment rather than become an obstacle around which the finish is improvised. These details can determine how well a simple colour scheme works in practice.
If external wall insulation is included, the new depth makes those decisions more substantial. Sill extensions, roof-edge changes and altered fixings may be needed. The insulation package should be compared with render-only work on its own terms, because the similar finished appearance hides a different construction. Make the boundary between the rendering contractor and other trades clear so associated work is completed before the final layers depend on it.
Organise the work around daily use
An occupied house needs a practical plan for entrances, deliveries, bins and access to the garden. The arrangement can change between removal, application and curing, so a programme should describe the stages rather than promise that nothing will be affected. Access equipment and protection need competent planning. Materials require suitable storage, and the selected system needs appropriate weather conditions. Those requirements should fit the site from the outset instead of being squeezed into whatever space remains after work starts.
Inspect and retain the information that matters
Before access is removed, review the agreed appearance and the details around openings, edges and fittings. Confirm what remains outstanding and who will complete it. Keep product names, colour references and relevant maintenance information, including the locations of different systems or retained areas. A later alteration should not have to begin by guessing what is on the wall. The single-wall guide helps if the project is limited, while the Crewe homepage connects the full service range. A clear house-rendering plan leaves both the finished exterior and its future care understandable.
Common questions
Can a front elevation be done now and the rear later?
Phasing may be possible, but the stopping points, access and future appearance need consideration. Keep the specification and sample information for the later stage. Weathering and application conditions can affect matching, so an identical future appearance should not be assumed.
Does a new render finish include repairs to windows and gutters?
Only if the agreed scope includes those operations and assigns them to suitable trades. They may be necessary before rendering can proceed, but should not be assumed part of a general wall-area price. The programme needs to connect the separate responsibilities.
See housing and planning information for Crewe and nearby places, including the source and geography behind each figure.